T-DASH Trial Application – Activation
Introduction
This page will guide you through the process from application for T-DASH trial use to completion of T-DASH installation (startup).
- How to apply for a T-DASH trial
- How to install T-DASH
- Starting T-DASH
Tips : Switch the UI display language! - Tips : How to use T-DASH in a Proxy environment
1. How to apply for a T-DASH trial
1-1. Click the application button (Pink) in the upper right corner of the service website.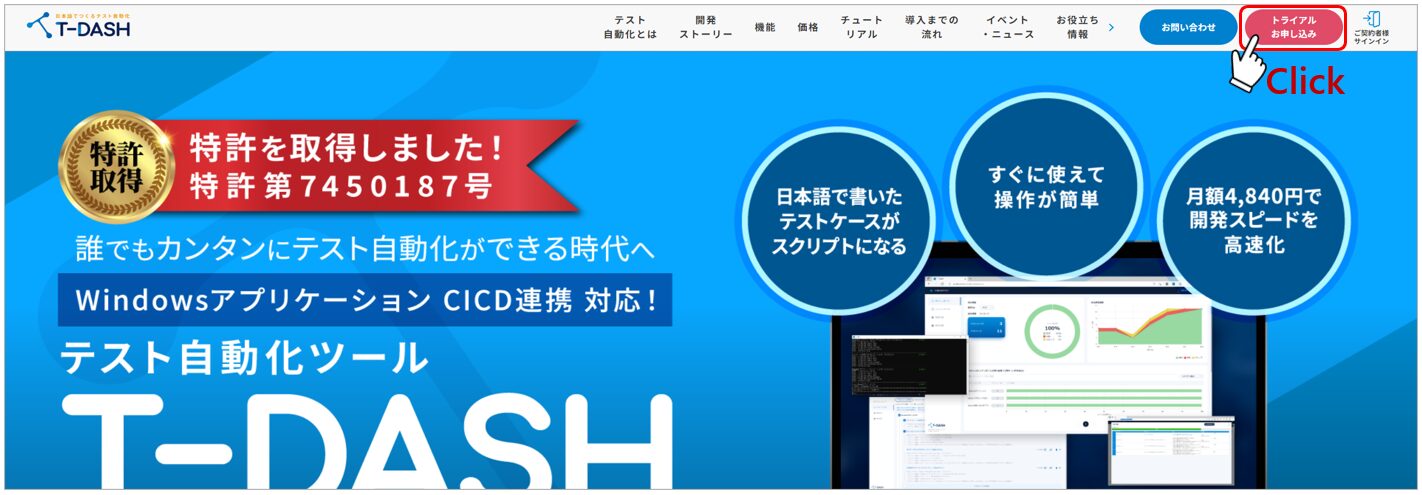
1-2. Enter the required information on the trial application page.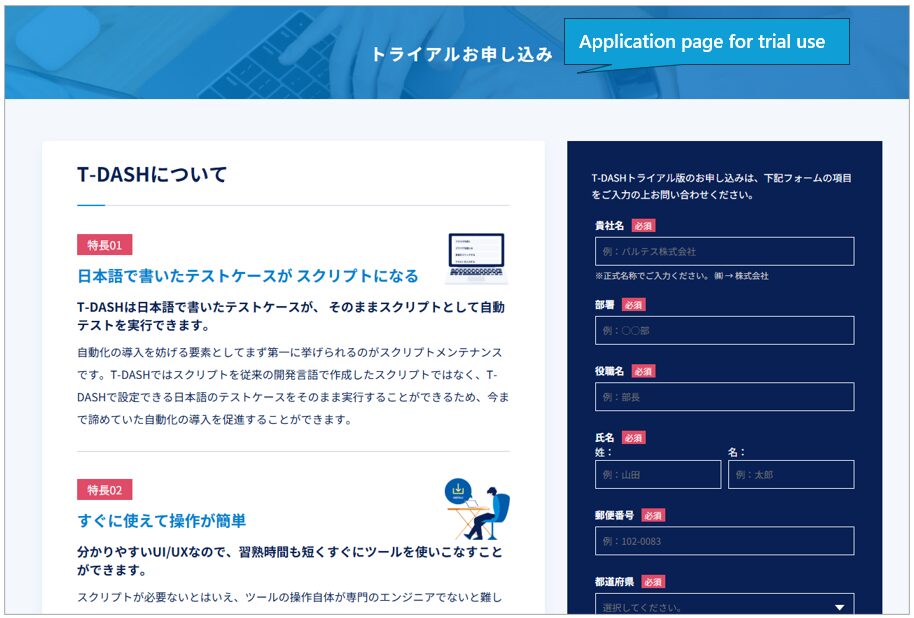
(1/3) Input Company, Department, Position, User Name, Post Code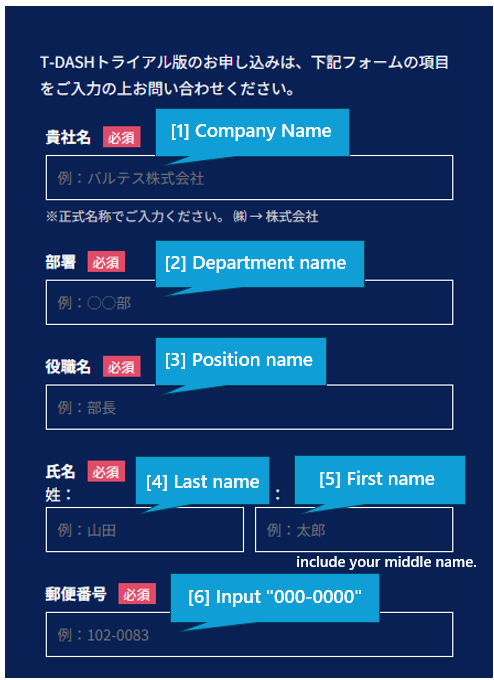
(2/3) Input “海外”, Address, Phone Number, Mail Address, Questionnaire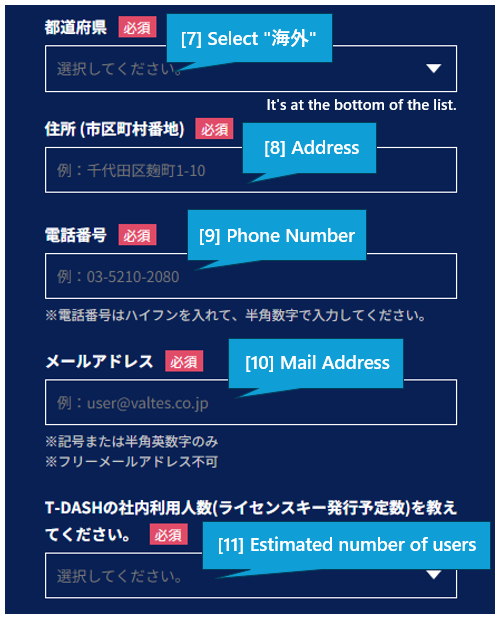
(3/3) Input Questionnaire, Agreement Confirmation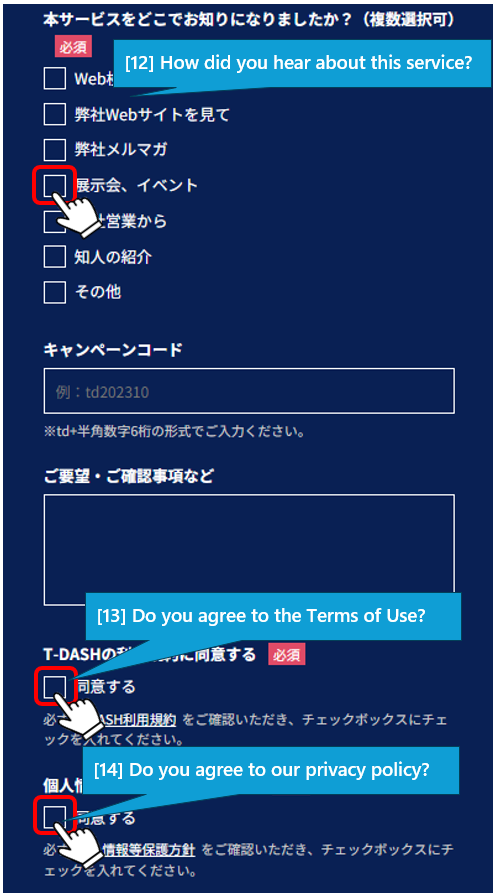
1-3. Click the Confirm button.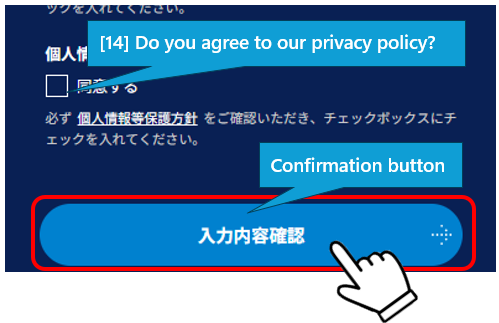
1-4. The application confirmation screen will appear. If all is well, click the Submit button.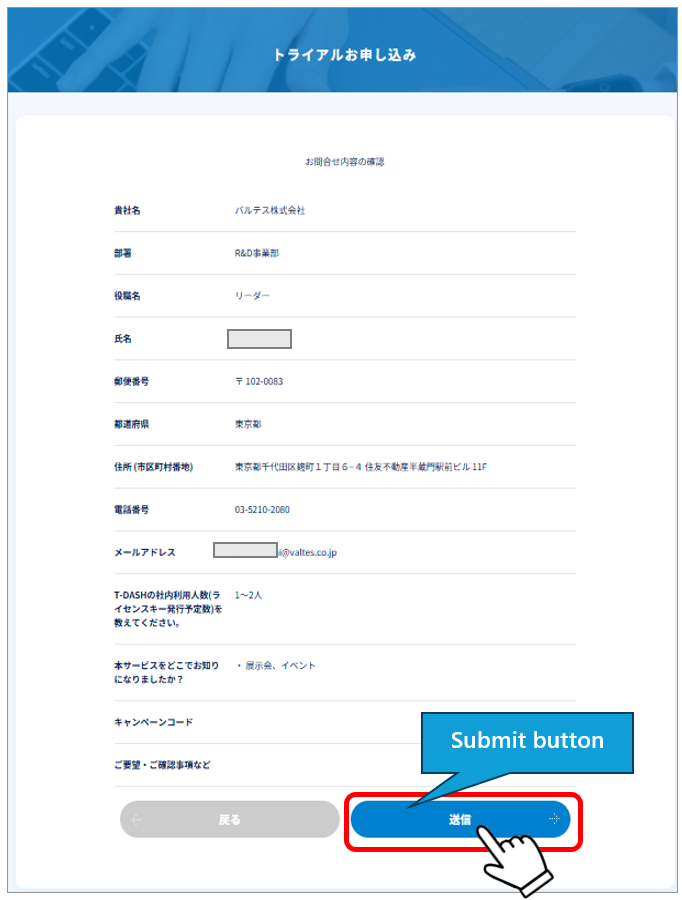
1-5. The application completion screen will be displayed. 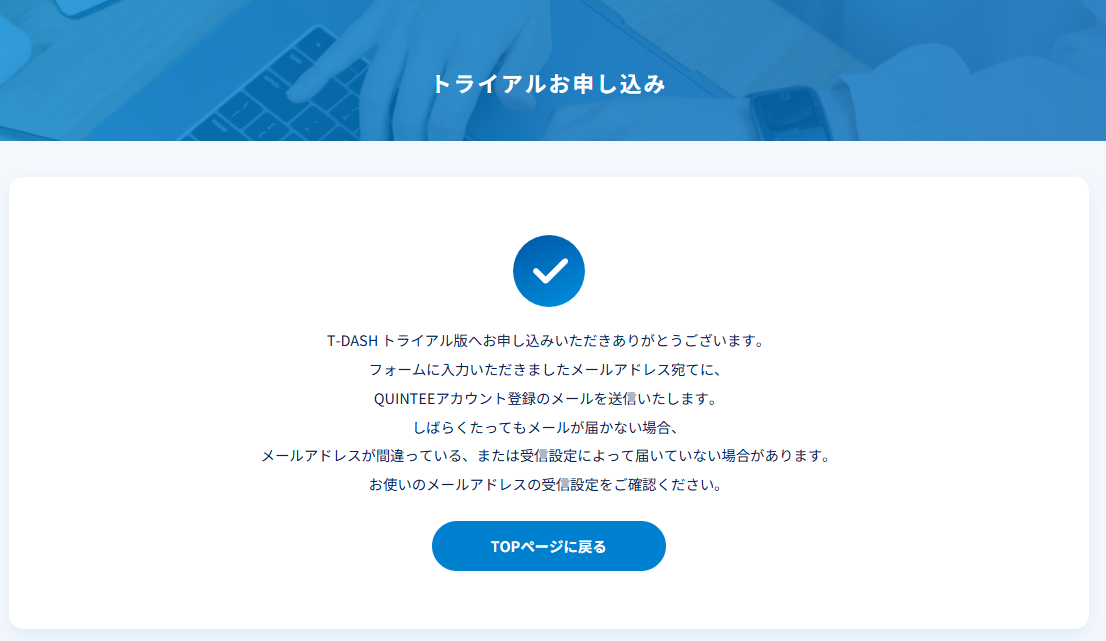
After a short while, you will then receive two emails to the email address you entered.
First Mail (Subject) : 「T-DASH」無料トライアルのお申し込みを受け付けました。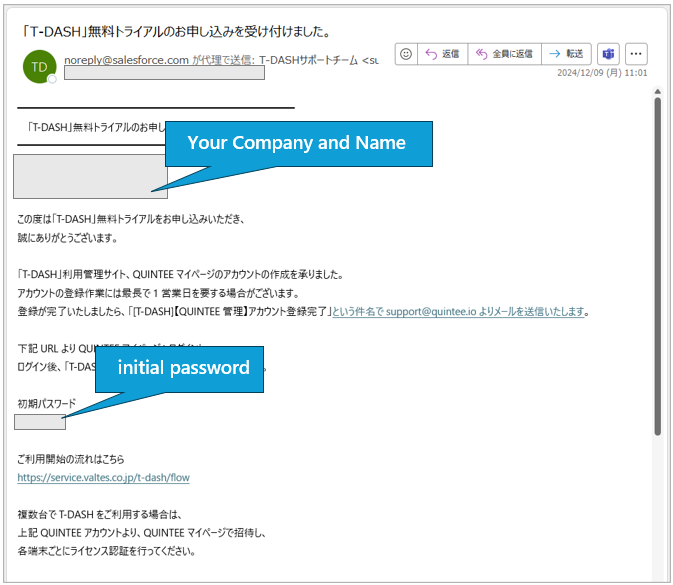
Second Mail (Subject) : [T-DASH]【QUINTEE管理】アカウント登録完了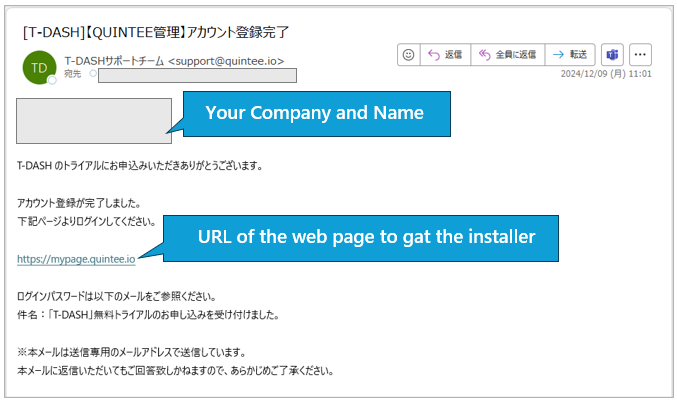
2. How to install T-DASH
2-1. Login to QUINTEE My Page.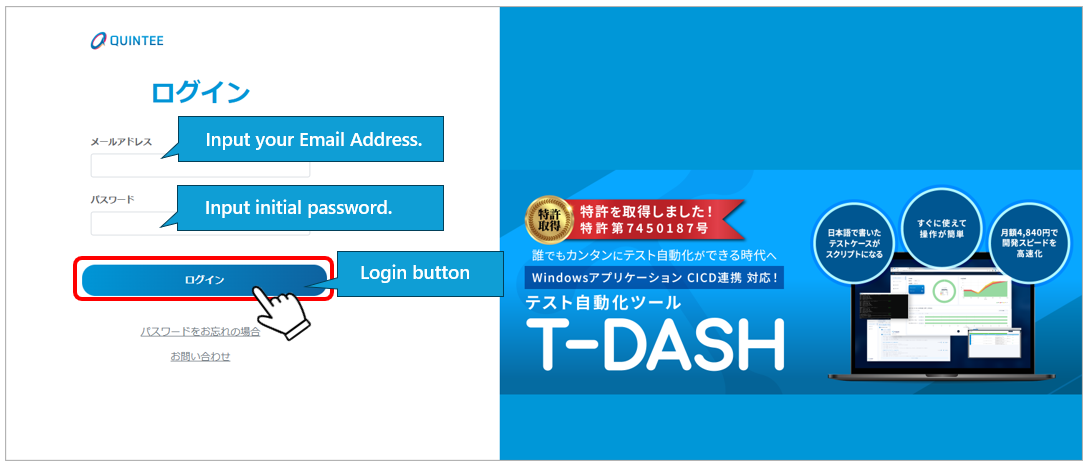
Attention
If you are logging in for the first time, the Change Password screen will appear.
Please change it to any password you wish.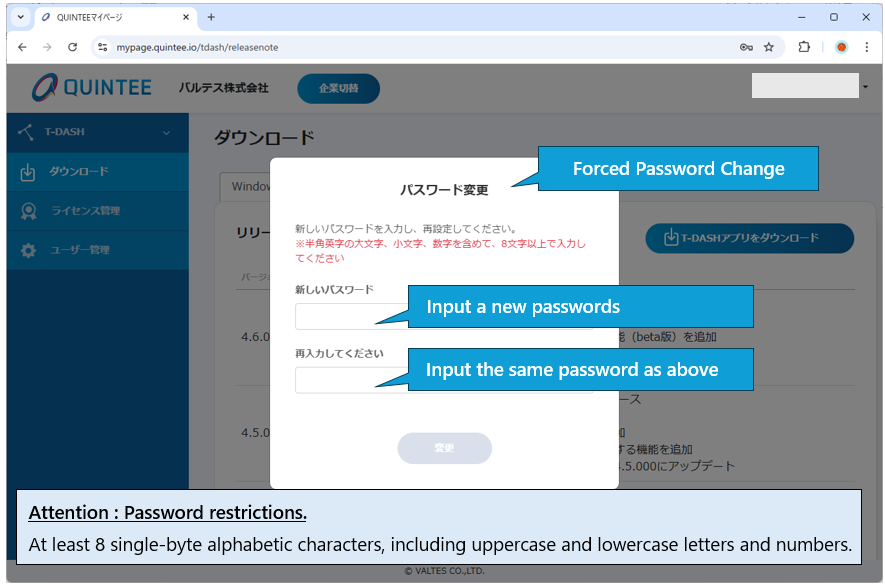
2-2. Download the installer for the OS of the PC on which T-DASH will be used from QINTEE My Page.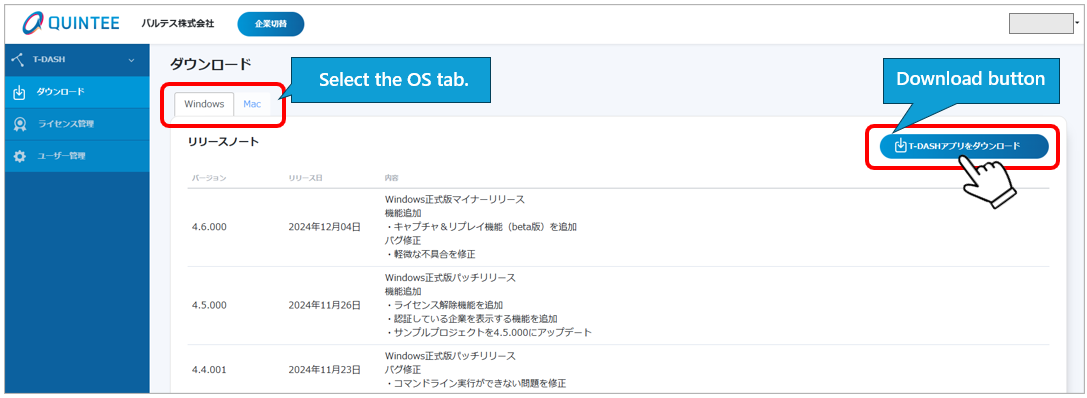
2-3. Unzip the downloaded installer and double-click “tdash-setup.exe”.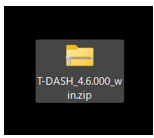
2-4. Complete the installation as the installation wizard appears.
(1/4) Confirmation of agreement to license agreement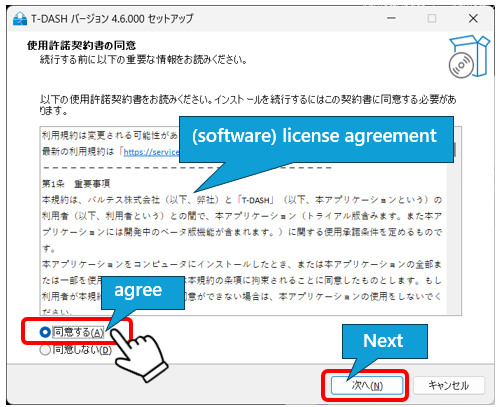
(2/4) Create an icon on the desktop.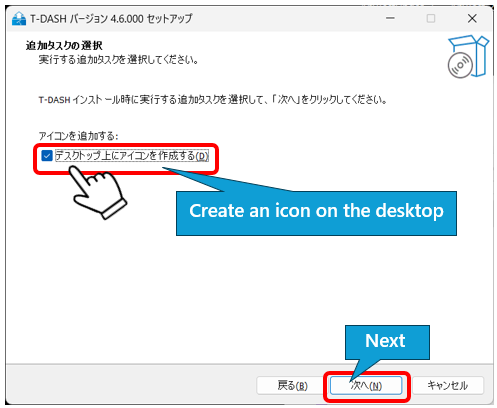
(3/4) Installing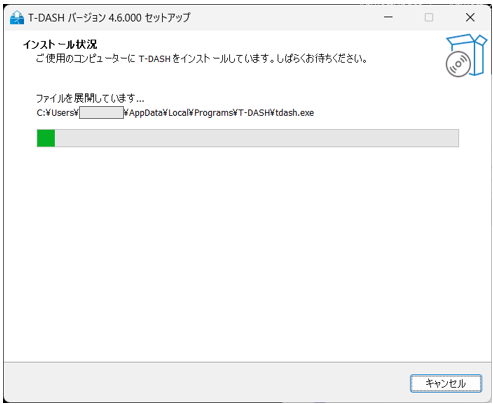
(4/4) Completed!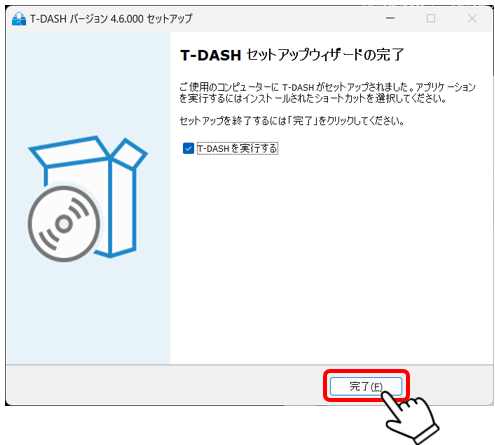
An icon now appears on the desktop and T-DASH will start automatically.![]()
3. Starting T-DASH
3-1. Double-click the T-DASH icon to open the console window and start T-DASH.
(Immediately after installation, it will start automatically.)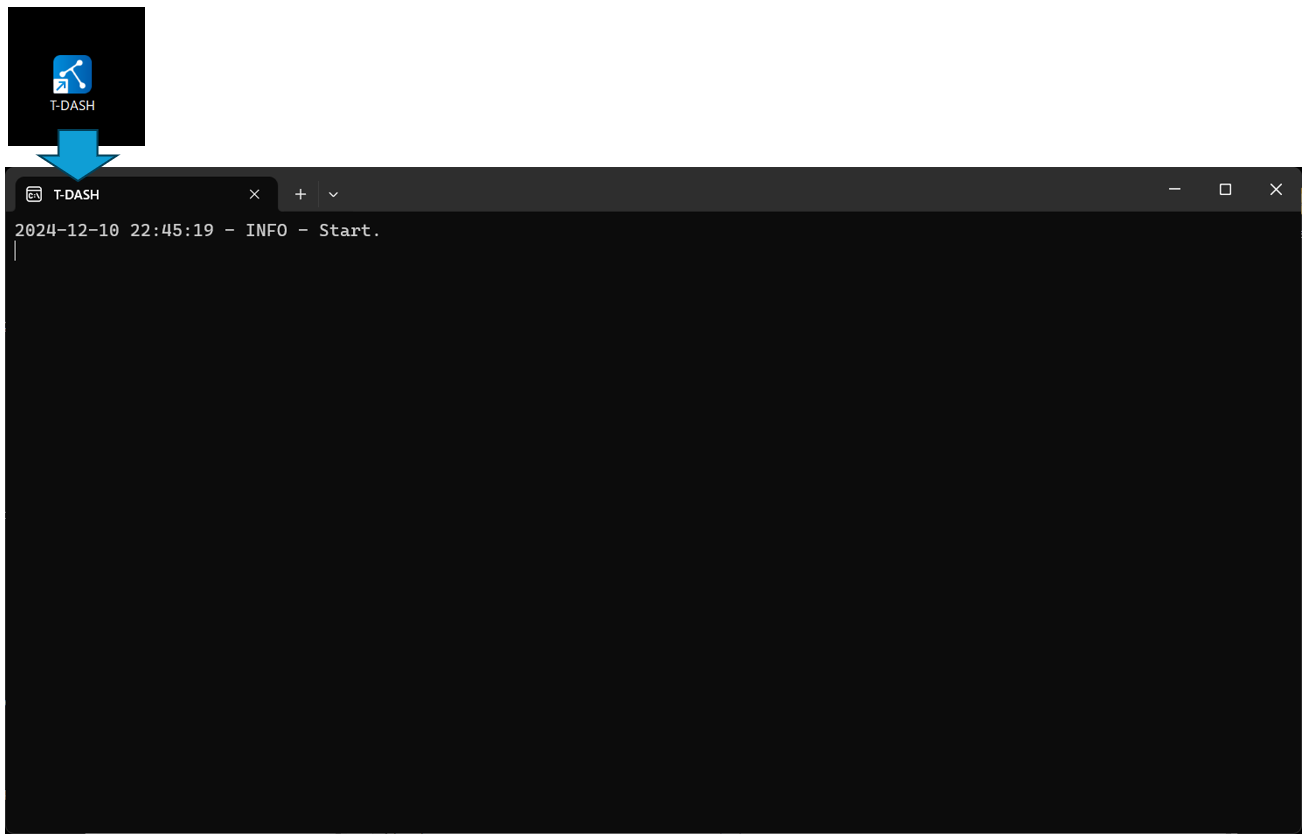
3-2. Display the T-DASH authentication method selection screen in your default web browser.
(Click the QUINTEE account authentication button.)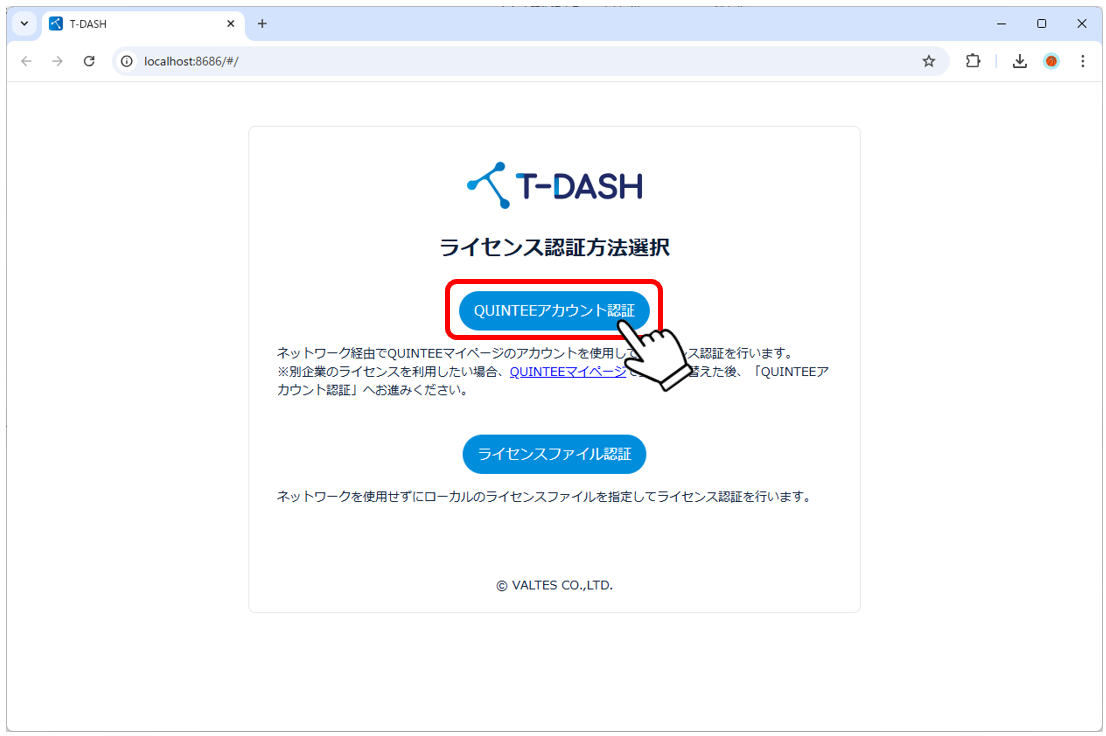
3-3. On the authentication screen, enter the email address and password for your QUINTEE My Page account and click the authentication button.
(Proxy settings are required for use in a proxy environment).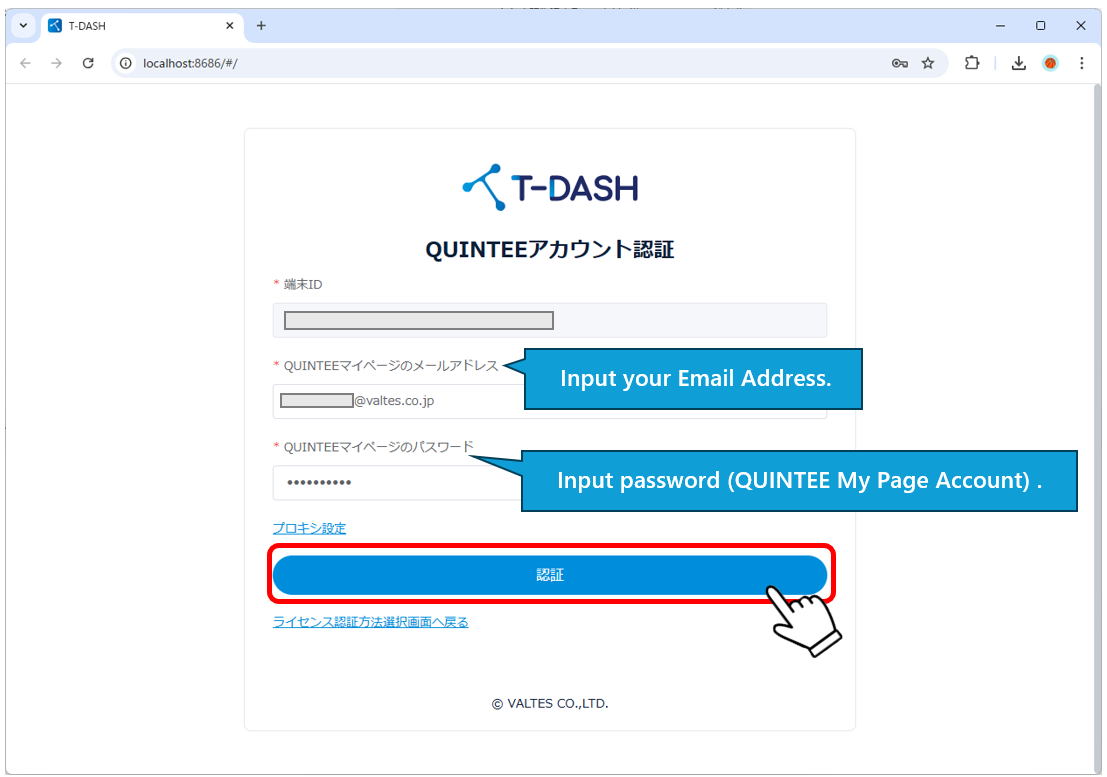
3-4. The startup processing modal is displayed.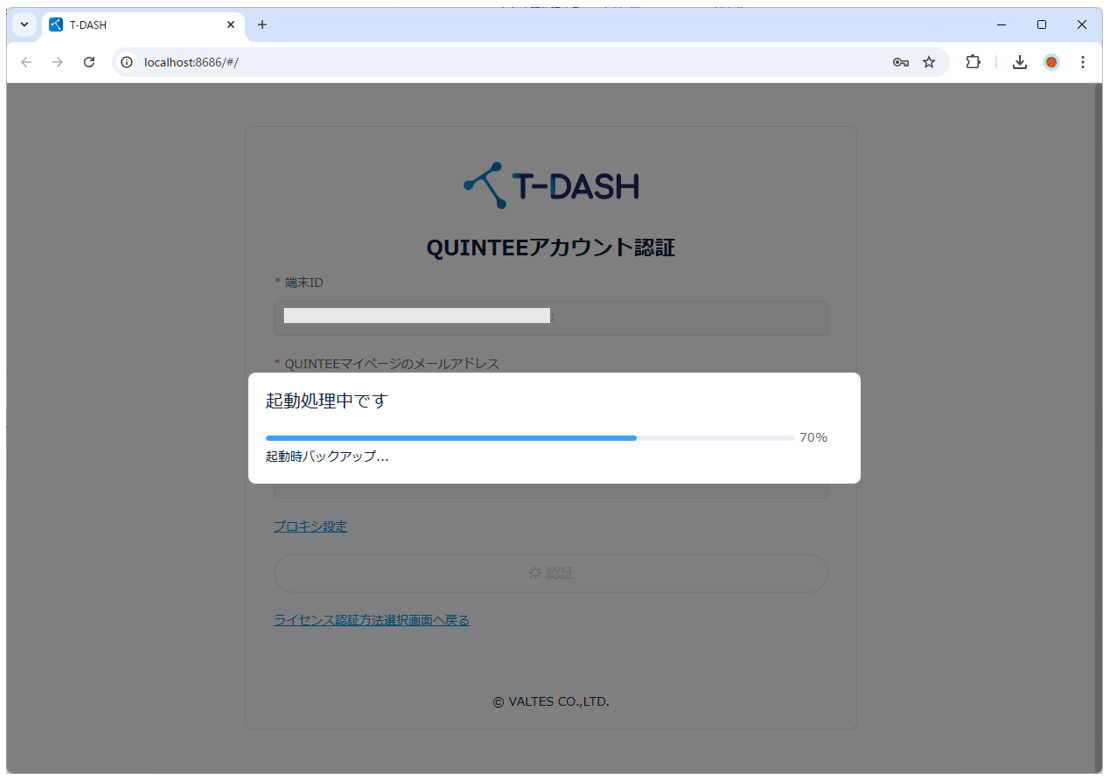
3-5. T-DASH will start and the project list screen (initial display screen after startup) will appear.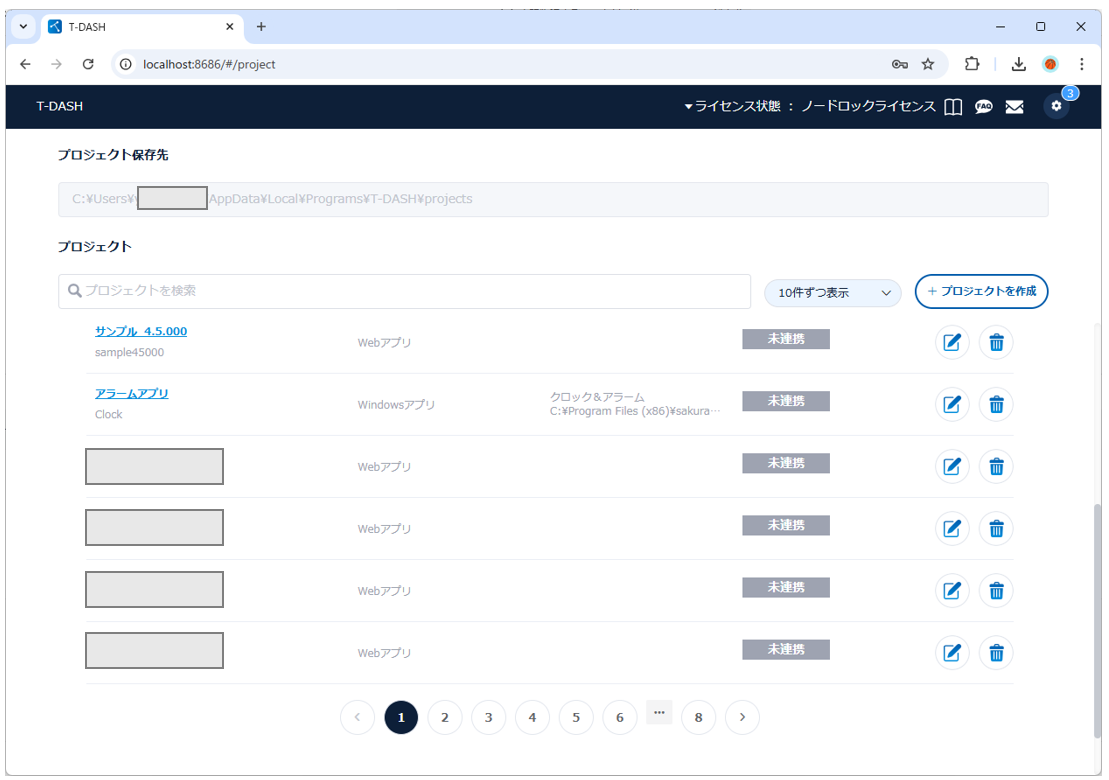
Tips : Switch the UI display language!
T-DASH allows you to switch the display language between Japanese and English.
Click the gear icon in the upper right corner, then click the second menu.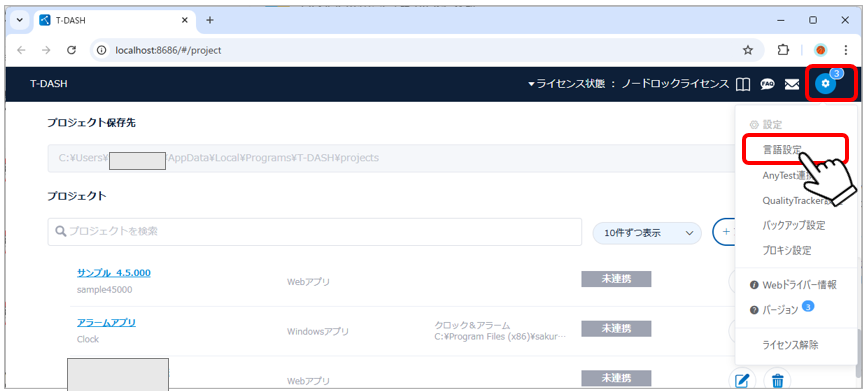
In the language settings screen, expand the list and select “English(En)”.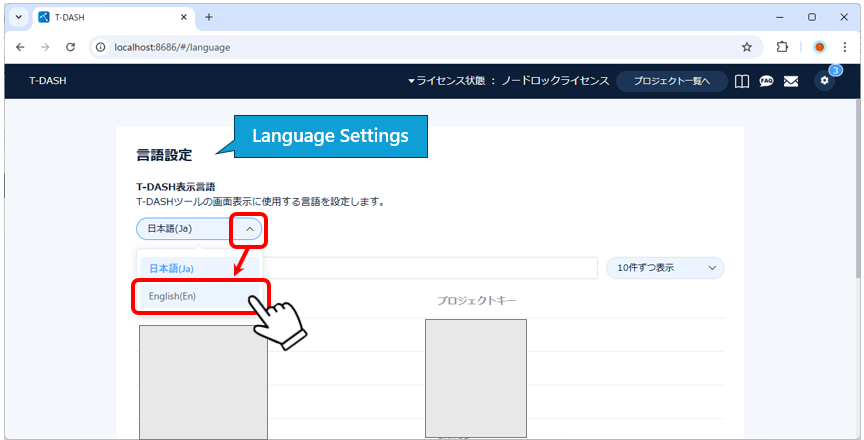
4. Tips : How to use T-DASH in a Proxy environment
4-1. After entering your QUINTEE My Page email address/password, click [Proxy Settings].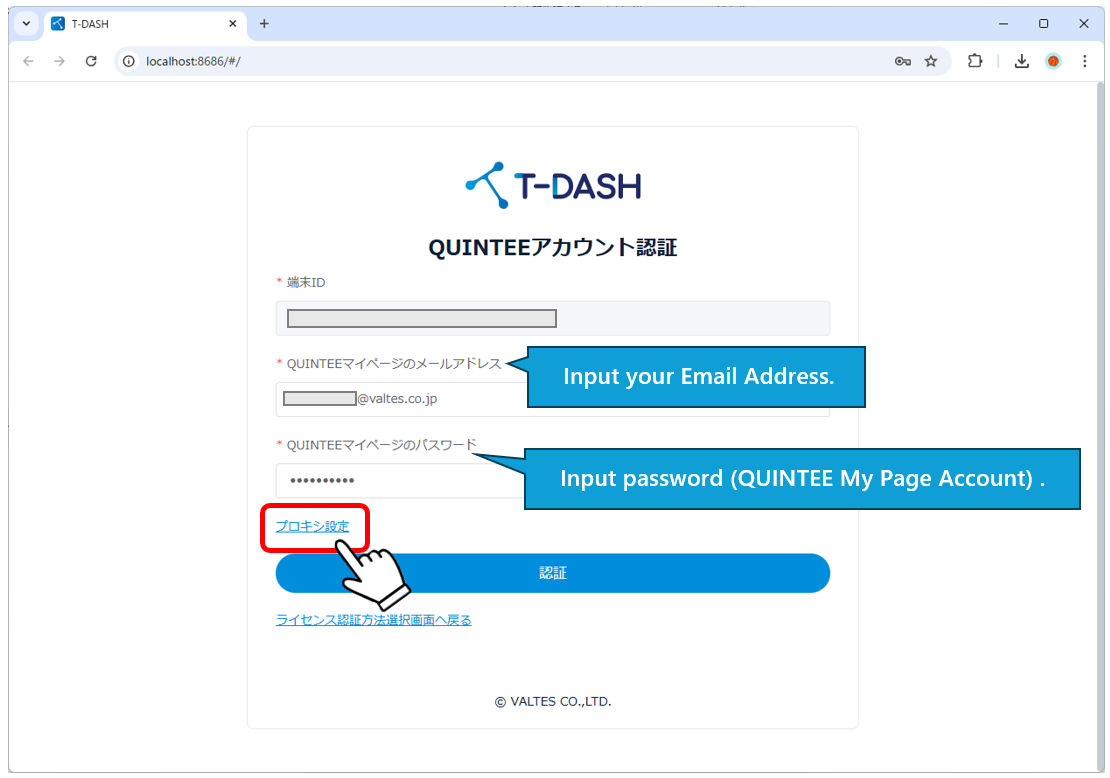
4-2. When the proxy settings screen appears, enter the required information.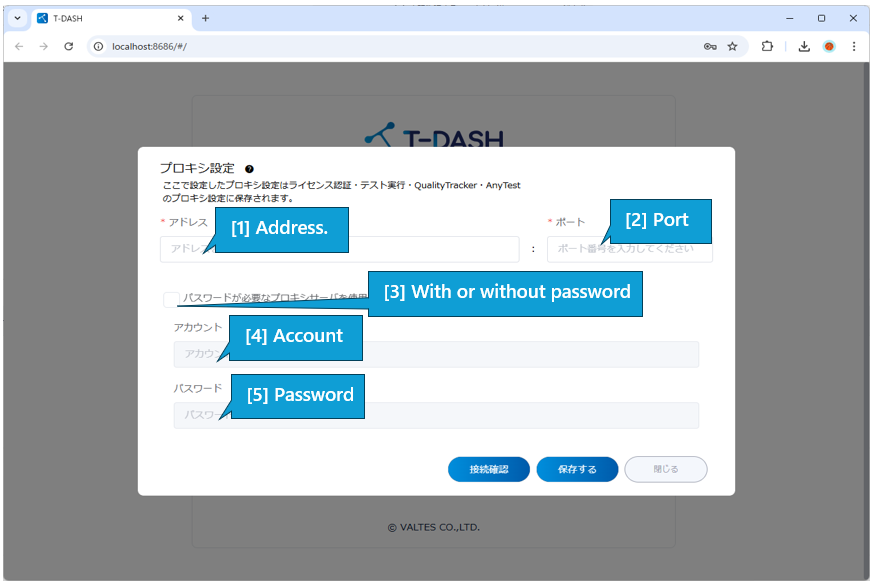
| Item | Description |
| [1] Address | Enter IP address or domain |
| [2] Port | Enter port number |
| [3] With or without password | Use a proxy server that requires a password or not |
| [4] Account | [Needed if the checkbox in [3] is checked.] Enter the account name of the proxy server |
| [5] Password | [Needed if the checkbox in [3] is checked.] Enter the Password of the proxy server |
4-3. Click the Save button.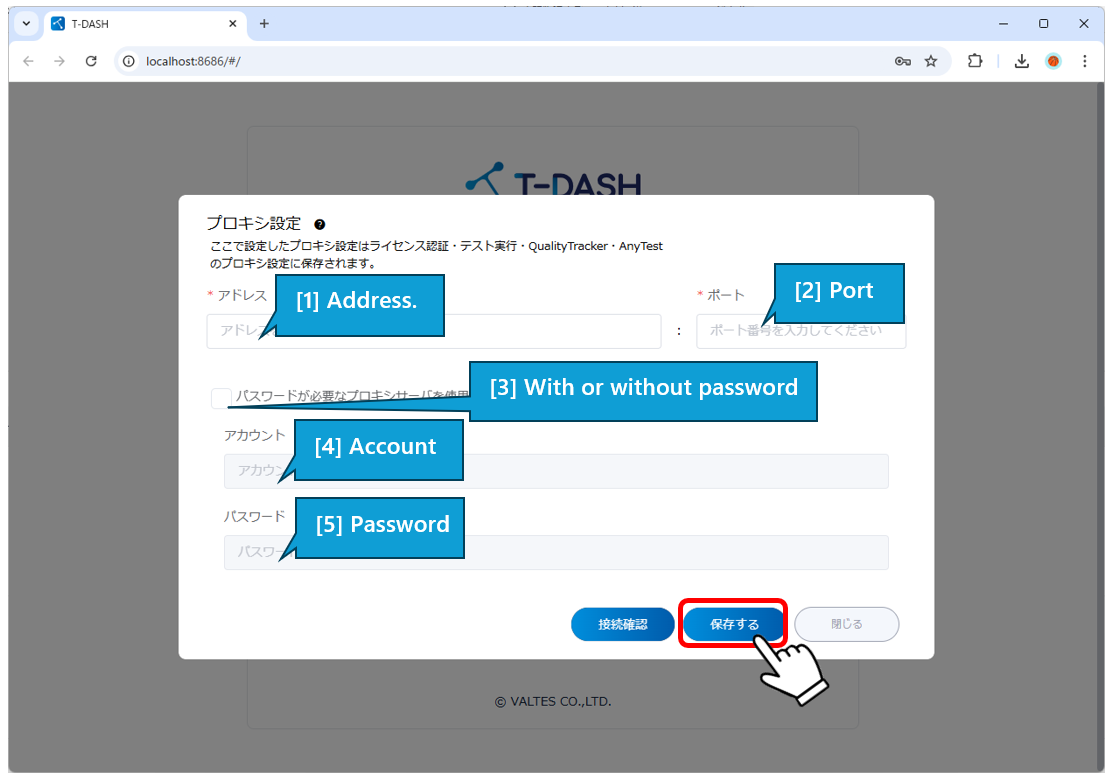
4-4. Click the authentication button.
